For most of us, email is a necessary evil of modern working life. Unfortunately, it can so easily suck time, leaving you stressed and under pressure to get all your other tasks done.
We are here to help. We don't want your email inbox to get you down so we've broken down eight great ways to organize your Gmail set-up to improve your productivity.
Getting started
Many of the changes we're suggesting need to be actioned in your Gmail's "Settings" area.
To access your settings in a browser, tap on the cog-shaped icon at the top right-hand corner of your screen.
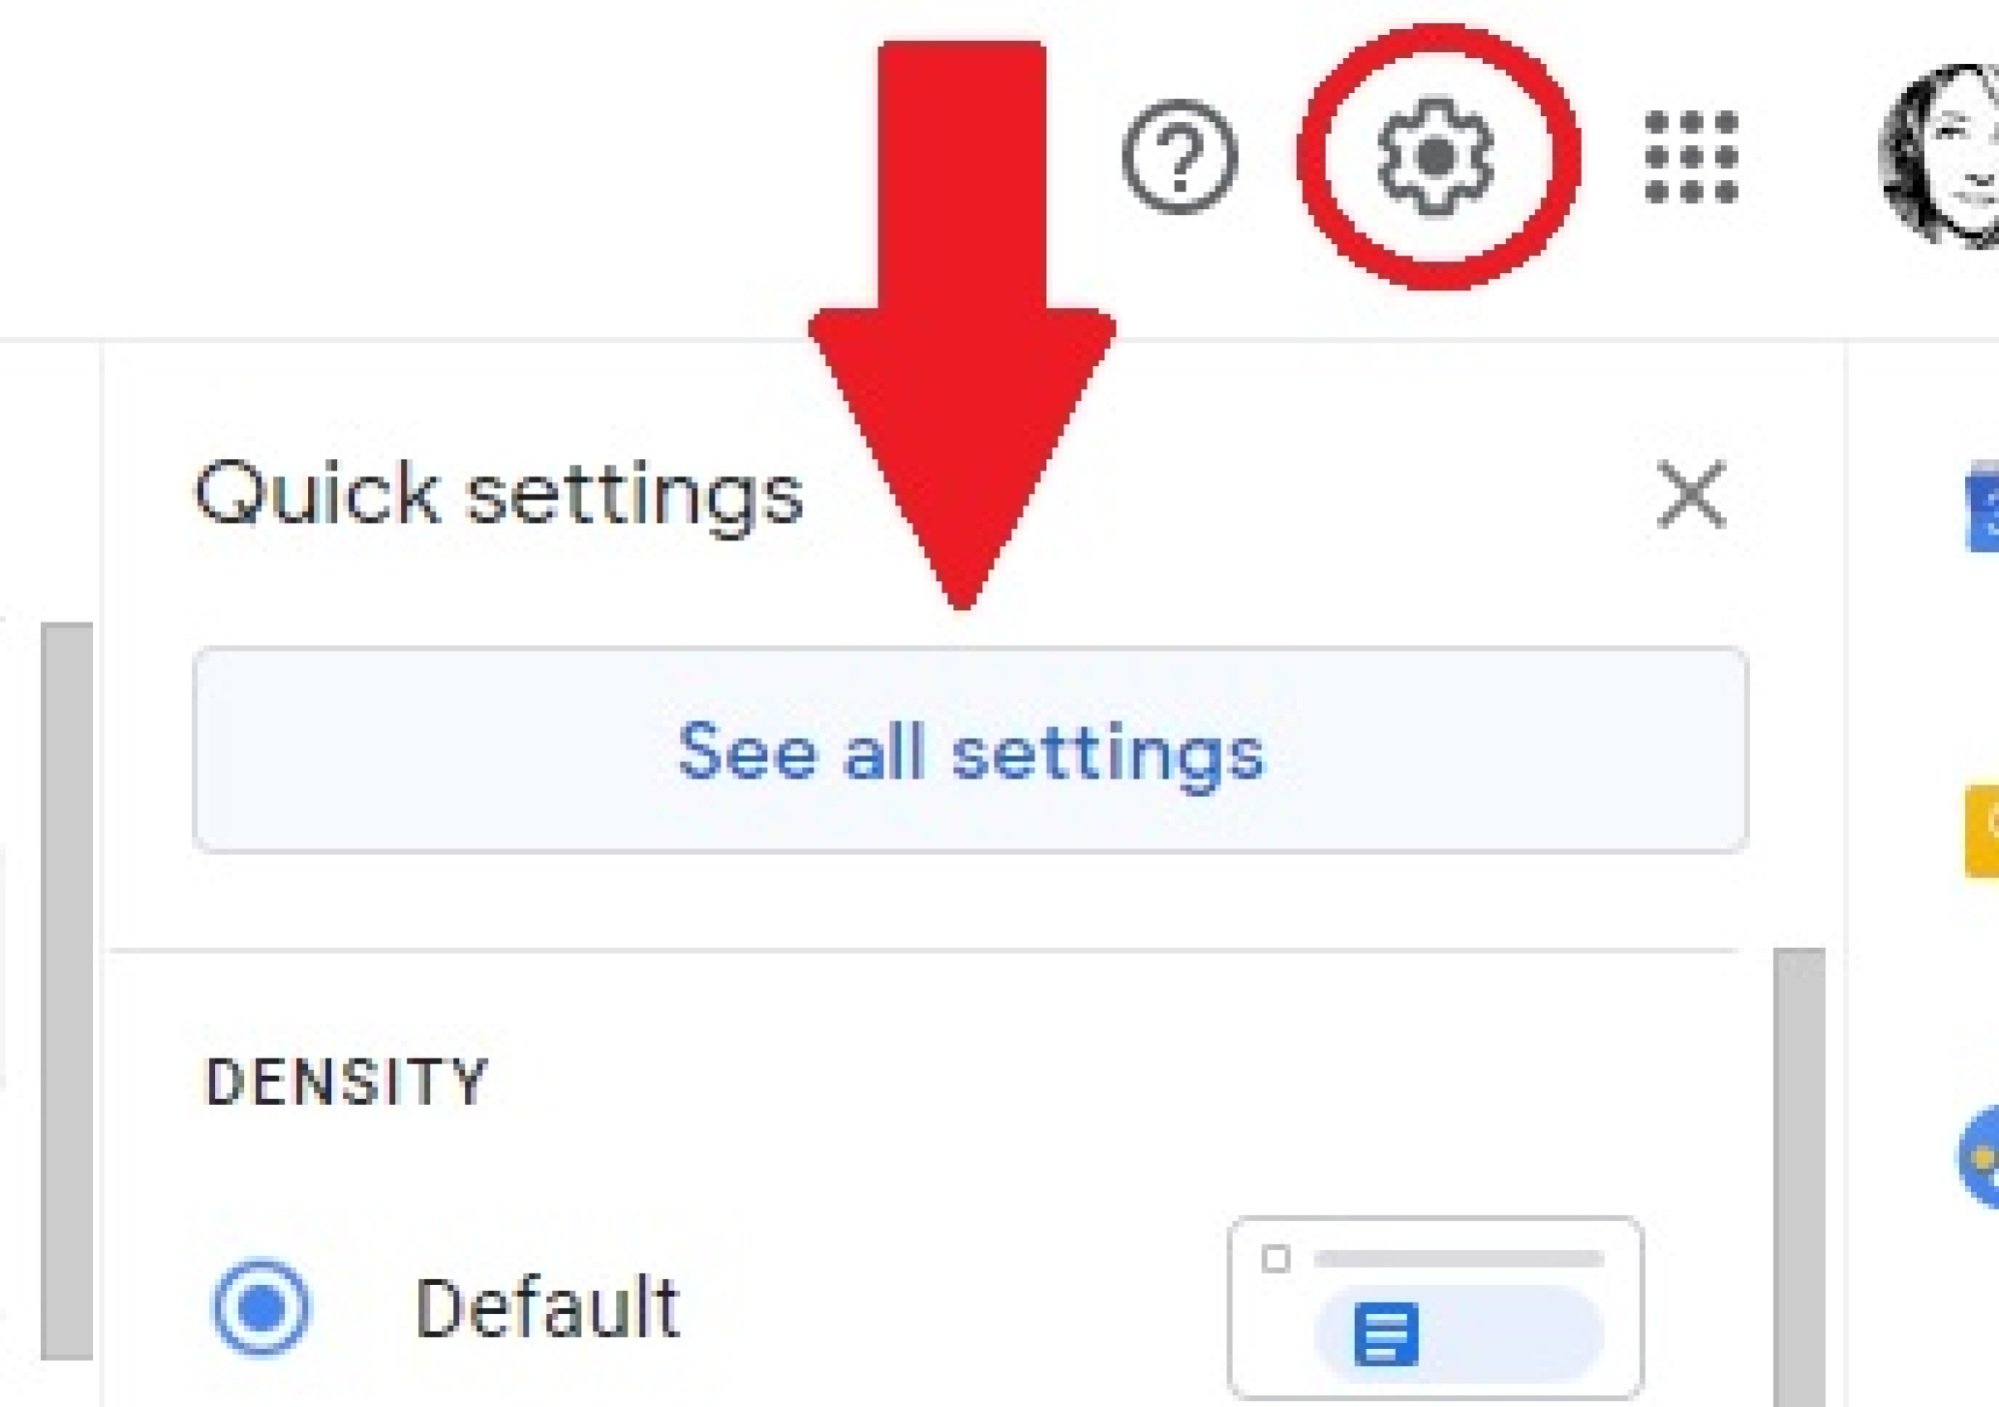
This will bring up your quick settings menu to the right of your screen. Click on the "See all settings" box to bring up the full-fat Gmail settings menu.
Set up a reading pane
A reading pane gives you a way to read emails alongside your standard inbox view. Many people find this makes it faster to read and reply to messages. You can select to see a reading pane below your inbox or to the right of your inbox.
To make these changes to your Gmail, head to your settings, then select the "Inbox" tab along the top of your screen. Now scroll down to see the "Enable reading pane" option. Check this and select where you'd like the pane to appear.

Rather than choose to have a permanent pane, you can also select an option that allows you to toggle between a split pane mode and your standard inbox view. To activate this option, select the "No split" option.
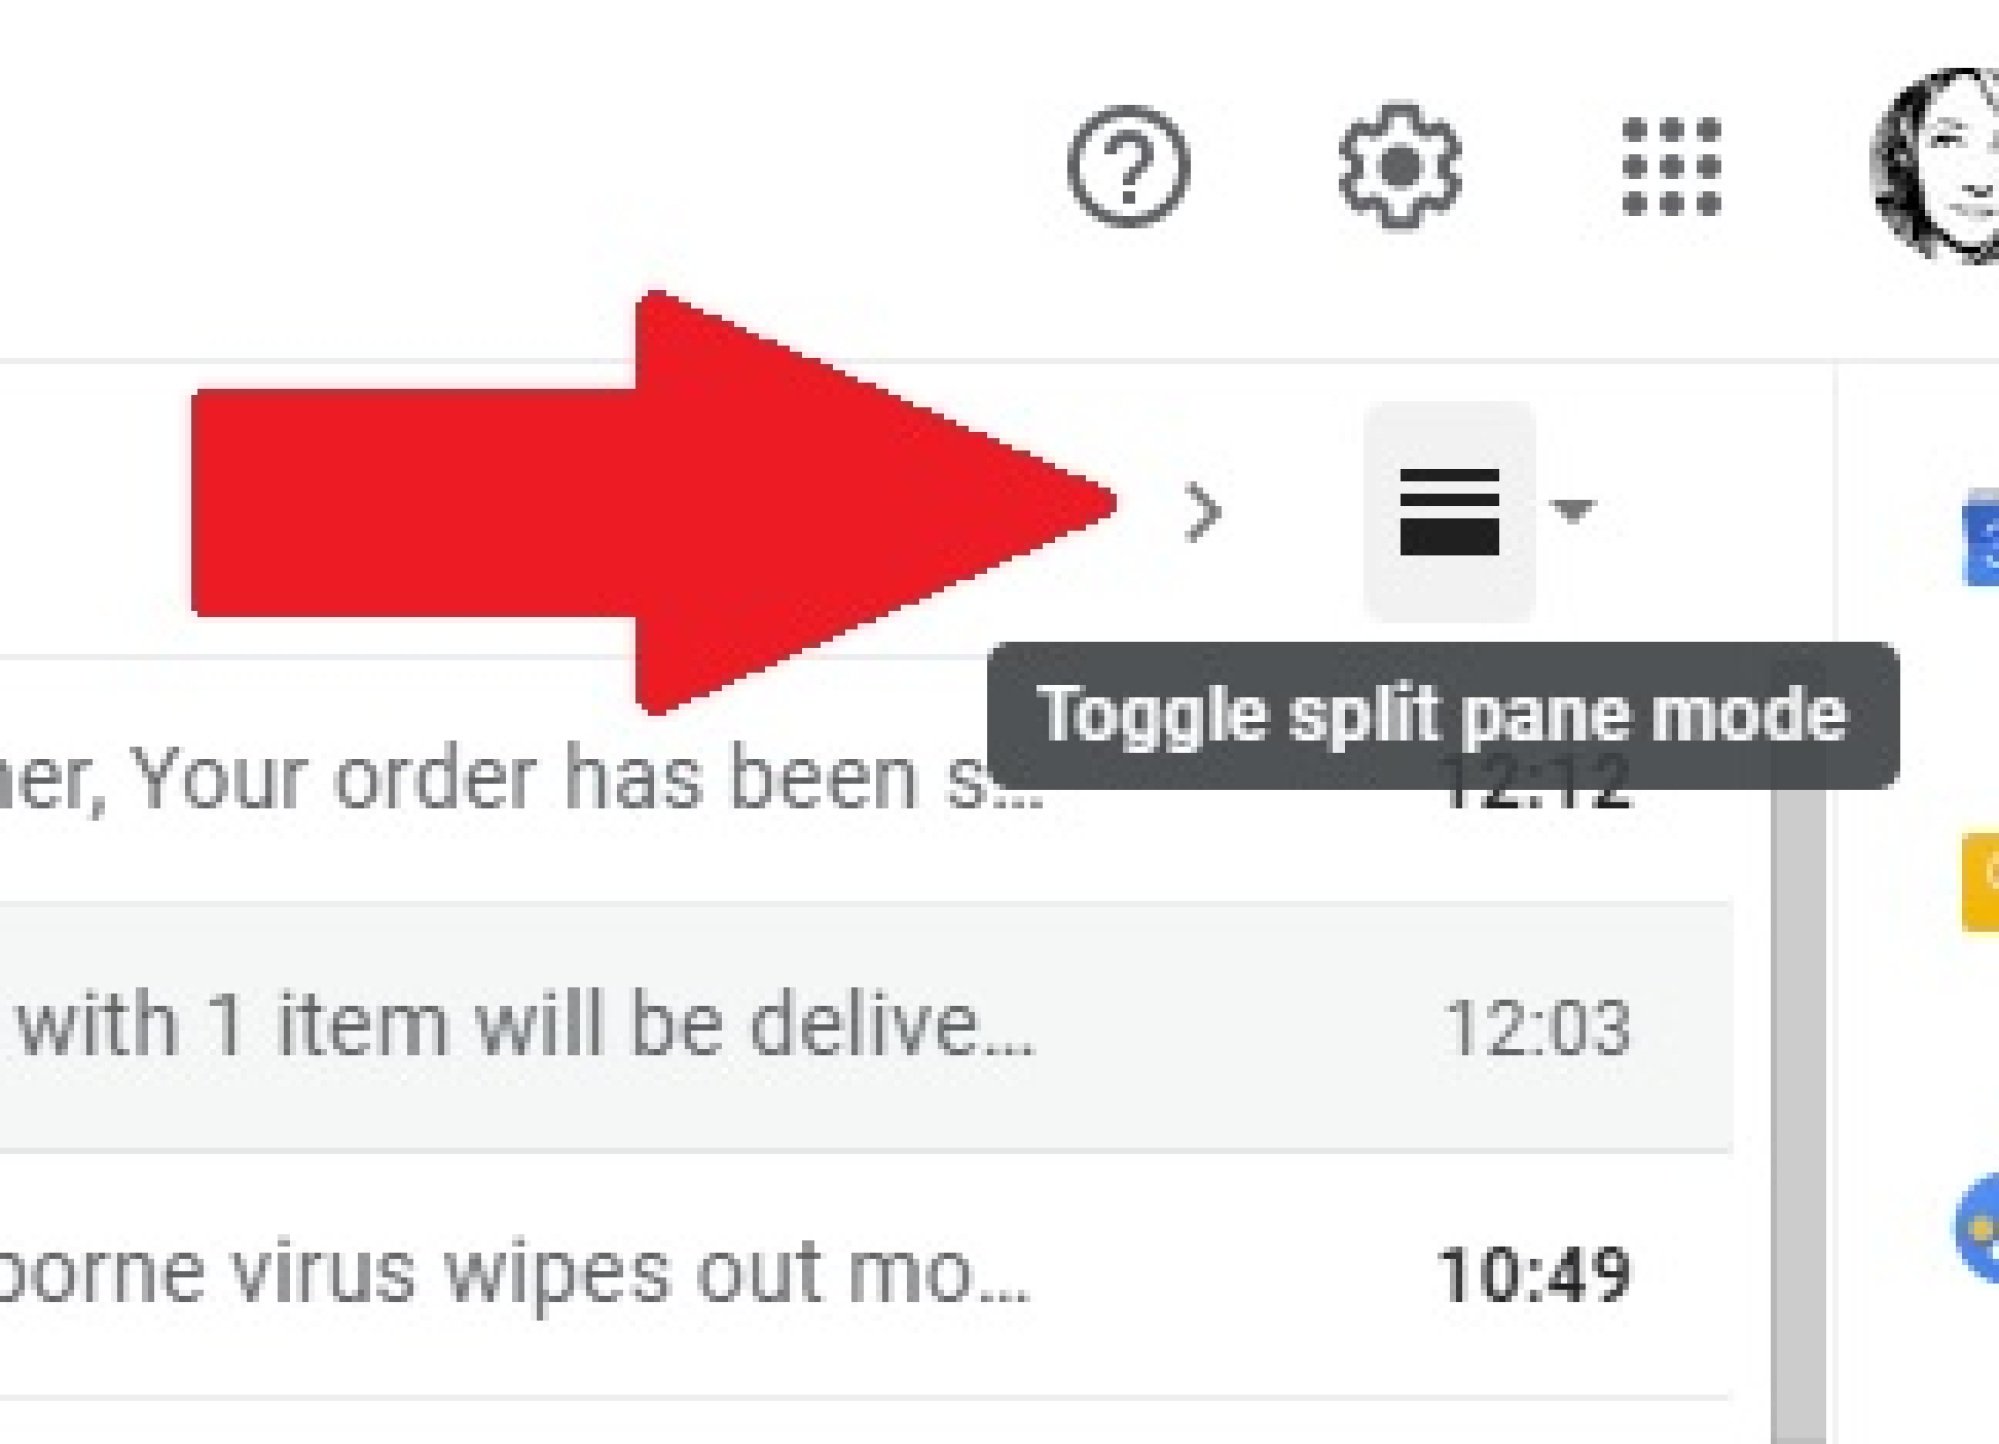
This adds an icon to the top right of your inbox that allows you to switch between seeing a preview pane below your inbox, or have a standard full inbox view.
Enable desktop notifications for Gmail
If you're waiting for an important email to come through, or you just don't want to miss a message from your boss, we recommend enabling Gmail's desktop notifications. This means you can work away in another browser tab and not have to keep obsessively checking your inbox to see if it has refreshed.
You can turn on Gmail desktop notifications by heading to your settings, then scrolling down the "General" options to see your "Desktop notifications" area.

Click to turn "New mail notifications on." Now, you'll see a pop-up notification in the bottom right-hand side of your browser screen when a new email is delivered.
Activate the unread message icon
Alternatively, if you're dead set against desktop notifications, but want to keep an eye on the status of your inbox whilst working in other tabs, there is another solution.
Go to Gmail Settings, then under the "Advanced" section, scroll down to see your "Unread message icon" options.

If you enable this, your Gmail favicon will show how many unread messages you have waiting for you as a teeny tiny number.
Create a group email list
This is a handy tool to really save you some serious time if you often email the same group of people. There is a way to set up a list of email addresses into one group that you can customize the name of.
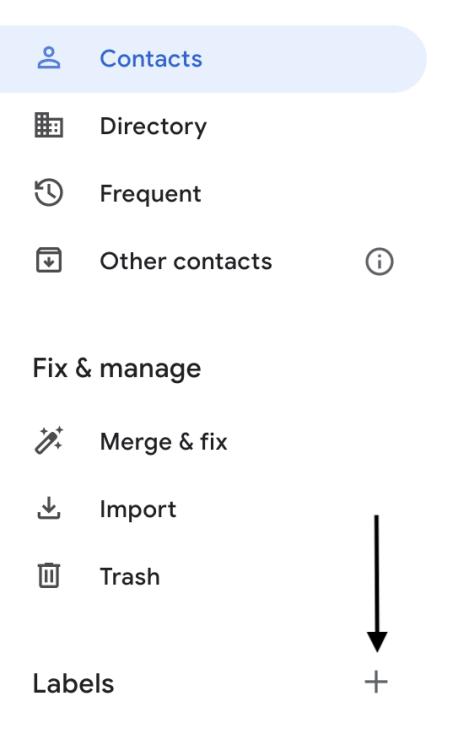
To do this, you need to go to Google Contacts(opens in a new tab). Look at the left-hand side of the screen to find the "Labels" button with a little plus sign next to it. Click on the plus sign to create a new label, naming it whatever you want in the process.
Now you can drag and drop contacts into that label from the list on the right.
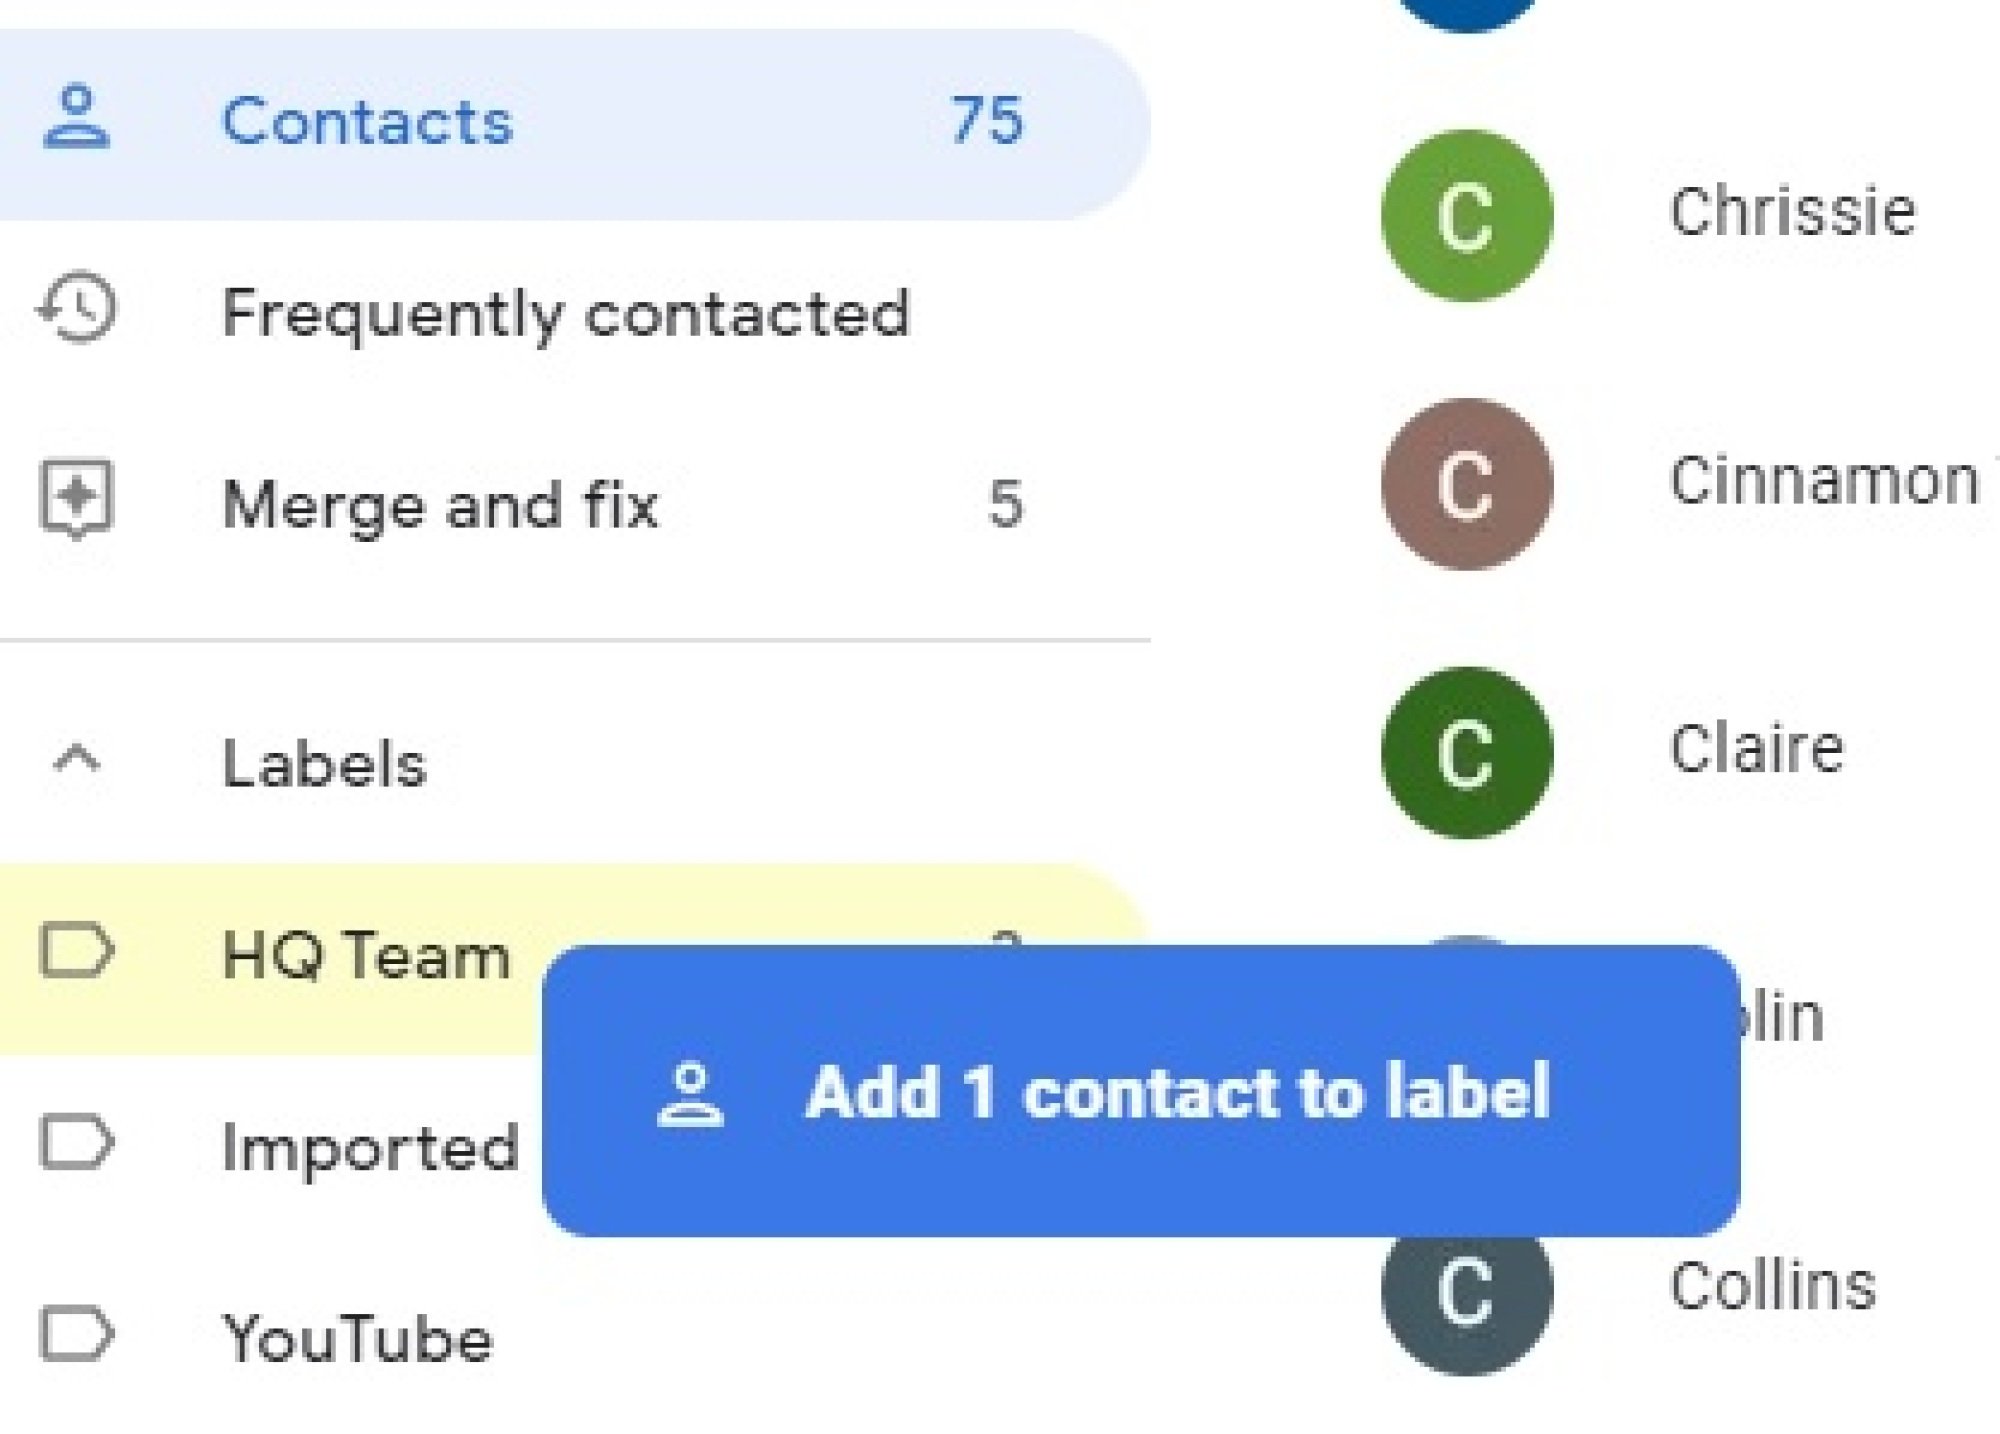
Now, when you're composing an email, start typing the name of the label you've created in the "To" field and you'll see your label pop up as a suggestion. Simply click on it to add the entire group as a recipient.
Create useful templates in Gmail
If you often email the same message, then you can save a ton of time by turning that basic missive into a template. You can create up to 50 Gmail templates that you can insert into the body of an email with just a few clicks.
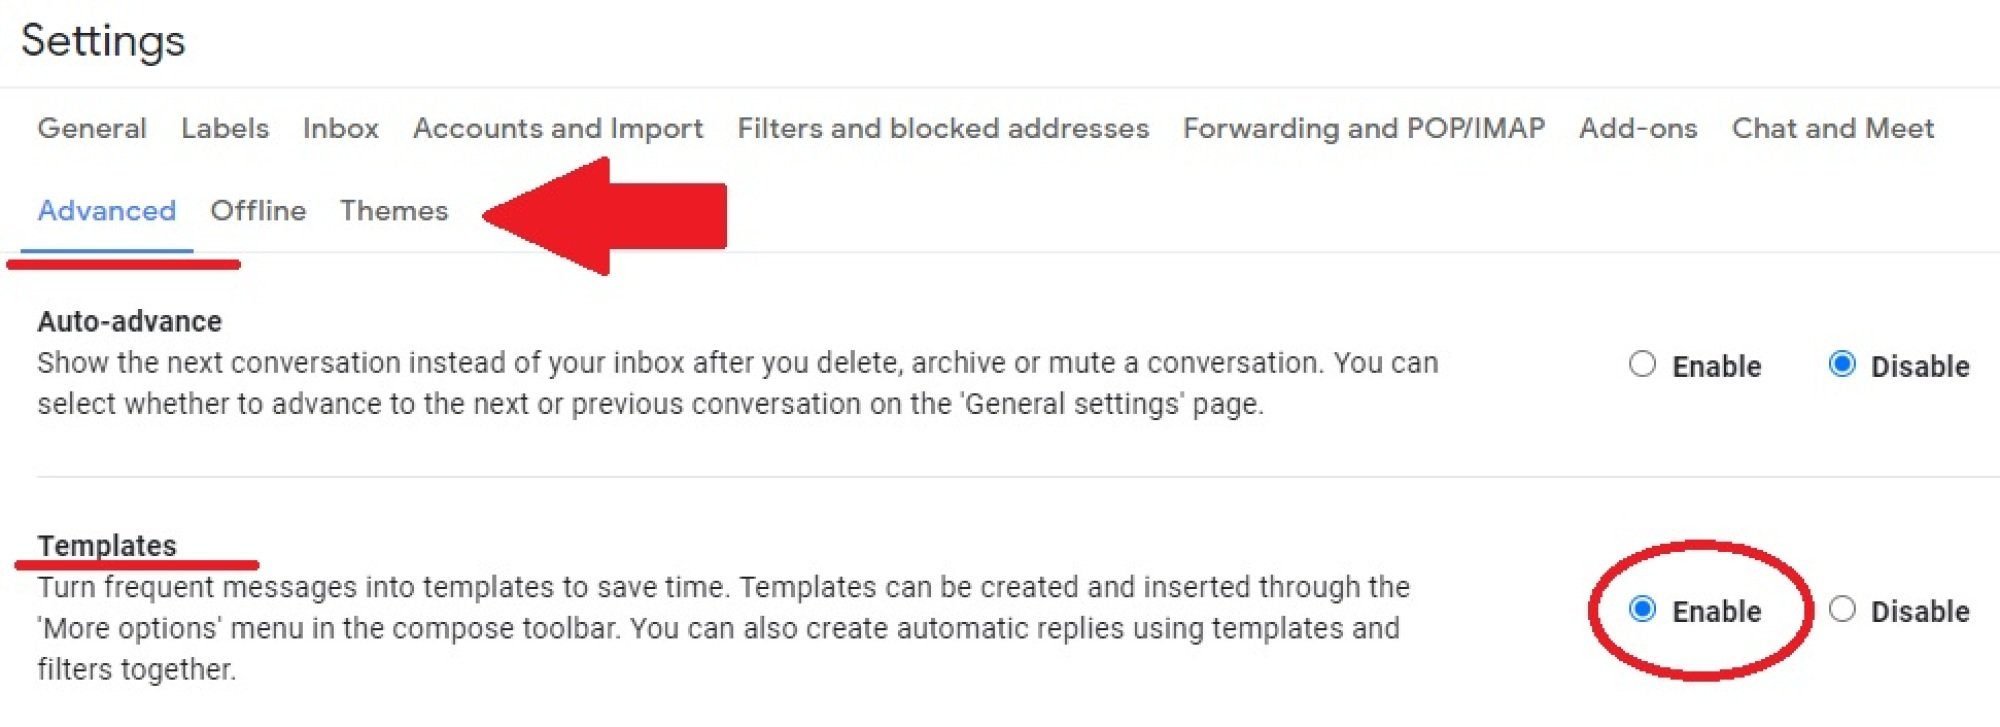
First, you need to enable your Gmail account to allow template creation. Go to your settings, then find the "Advanced" tab on the top row. Click "Enable" next to "Templates."
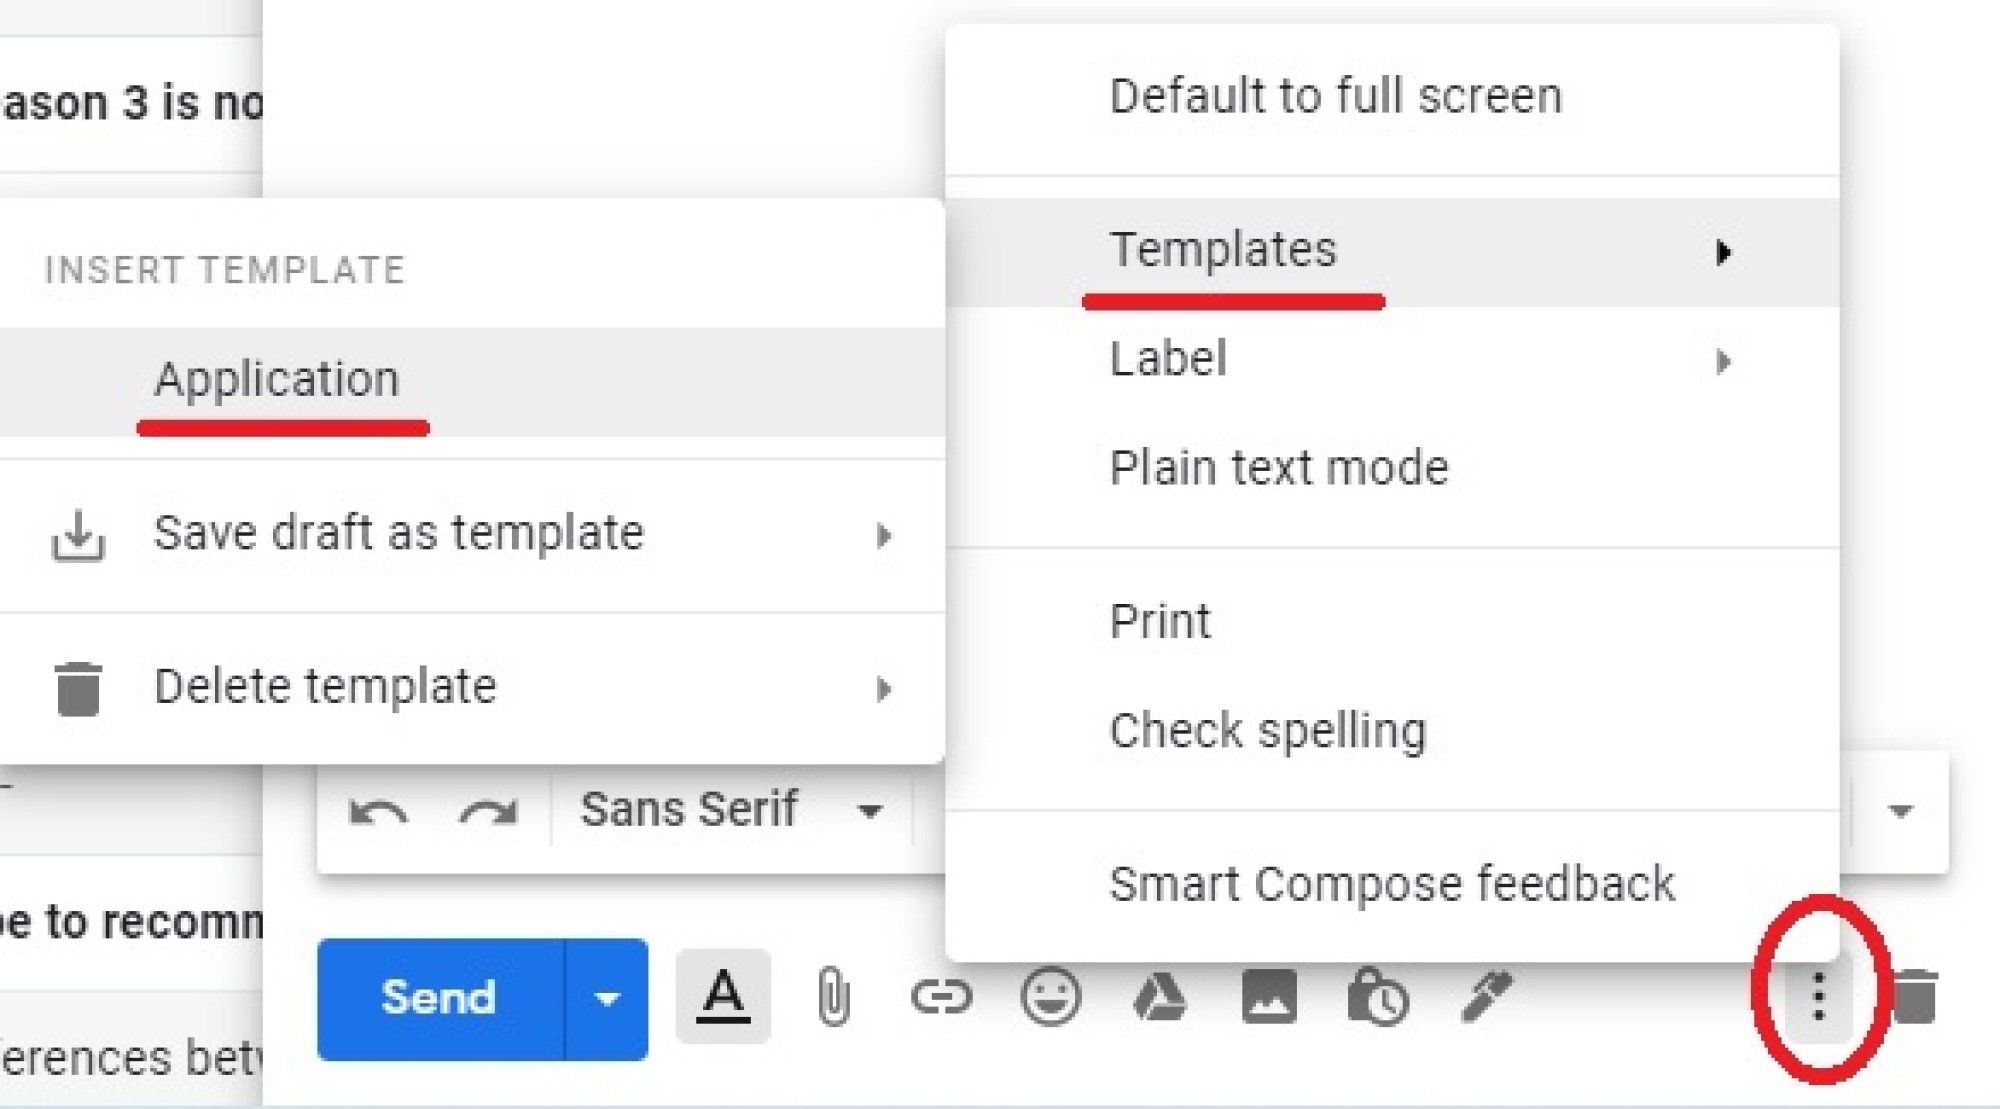
Head back to your inbox, open a new compose pop-up, and type exactly what you'd like the template's text to be. Once you've finished, click the three dots "More" menu at the bottom right of your compose window. Land on "Templates," then select to "Save draft as template."

Now you just need to give the template an easily recognizable name. To use your template, open a new compose email pop-up, click the three dots menu and "Templates" again, and select the name of your template from the next menu screen that appears.
Make the most of email labels
Labels are Gmail's version of creating folders in your inbox. To create a new label you need to look to the left of your Gmail inbox and scroll down until you can click the "More" option. Scroll down again and you'll see the option to "Create new label."
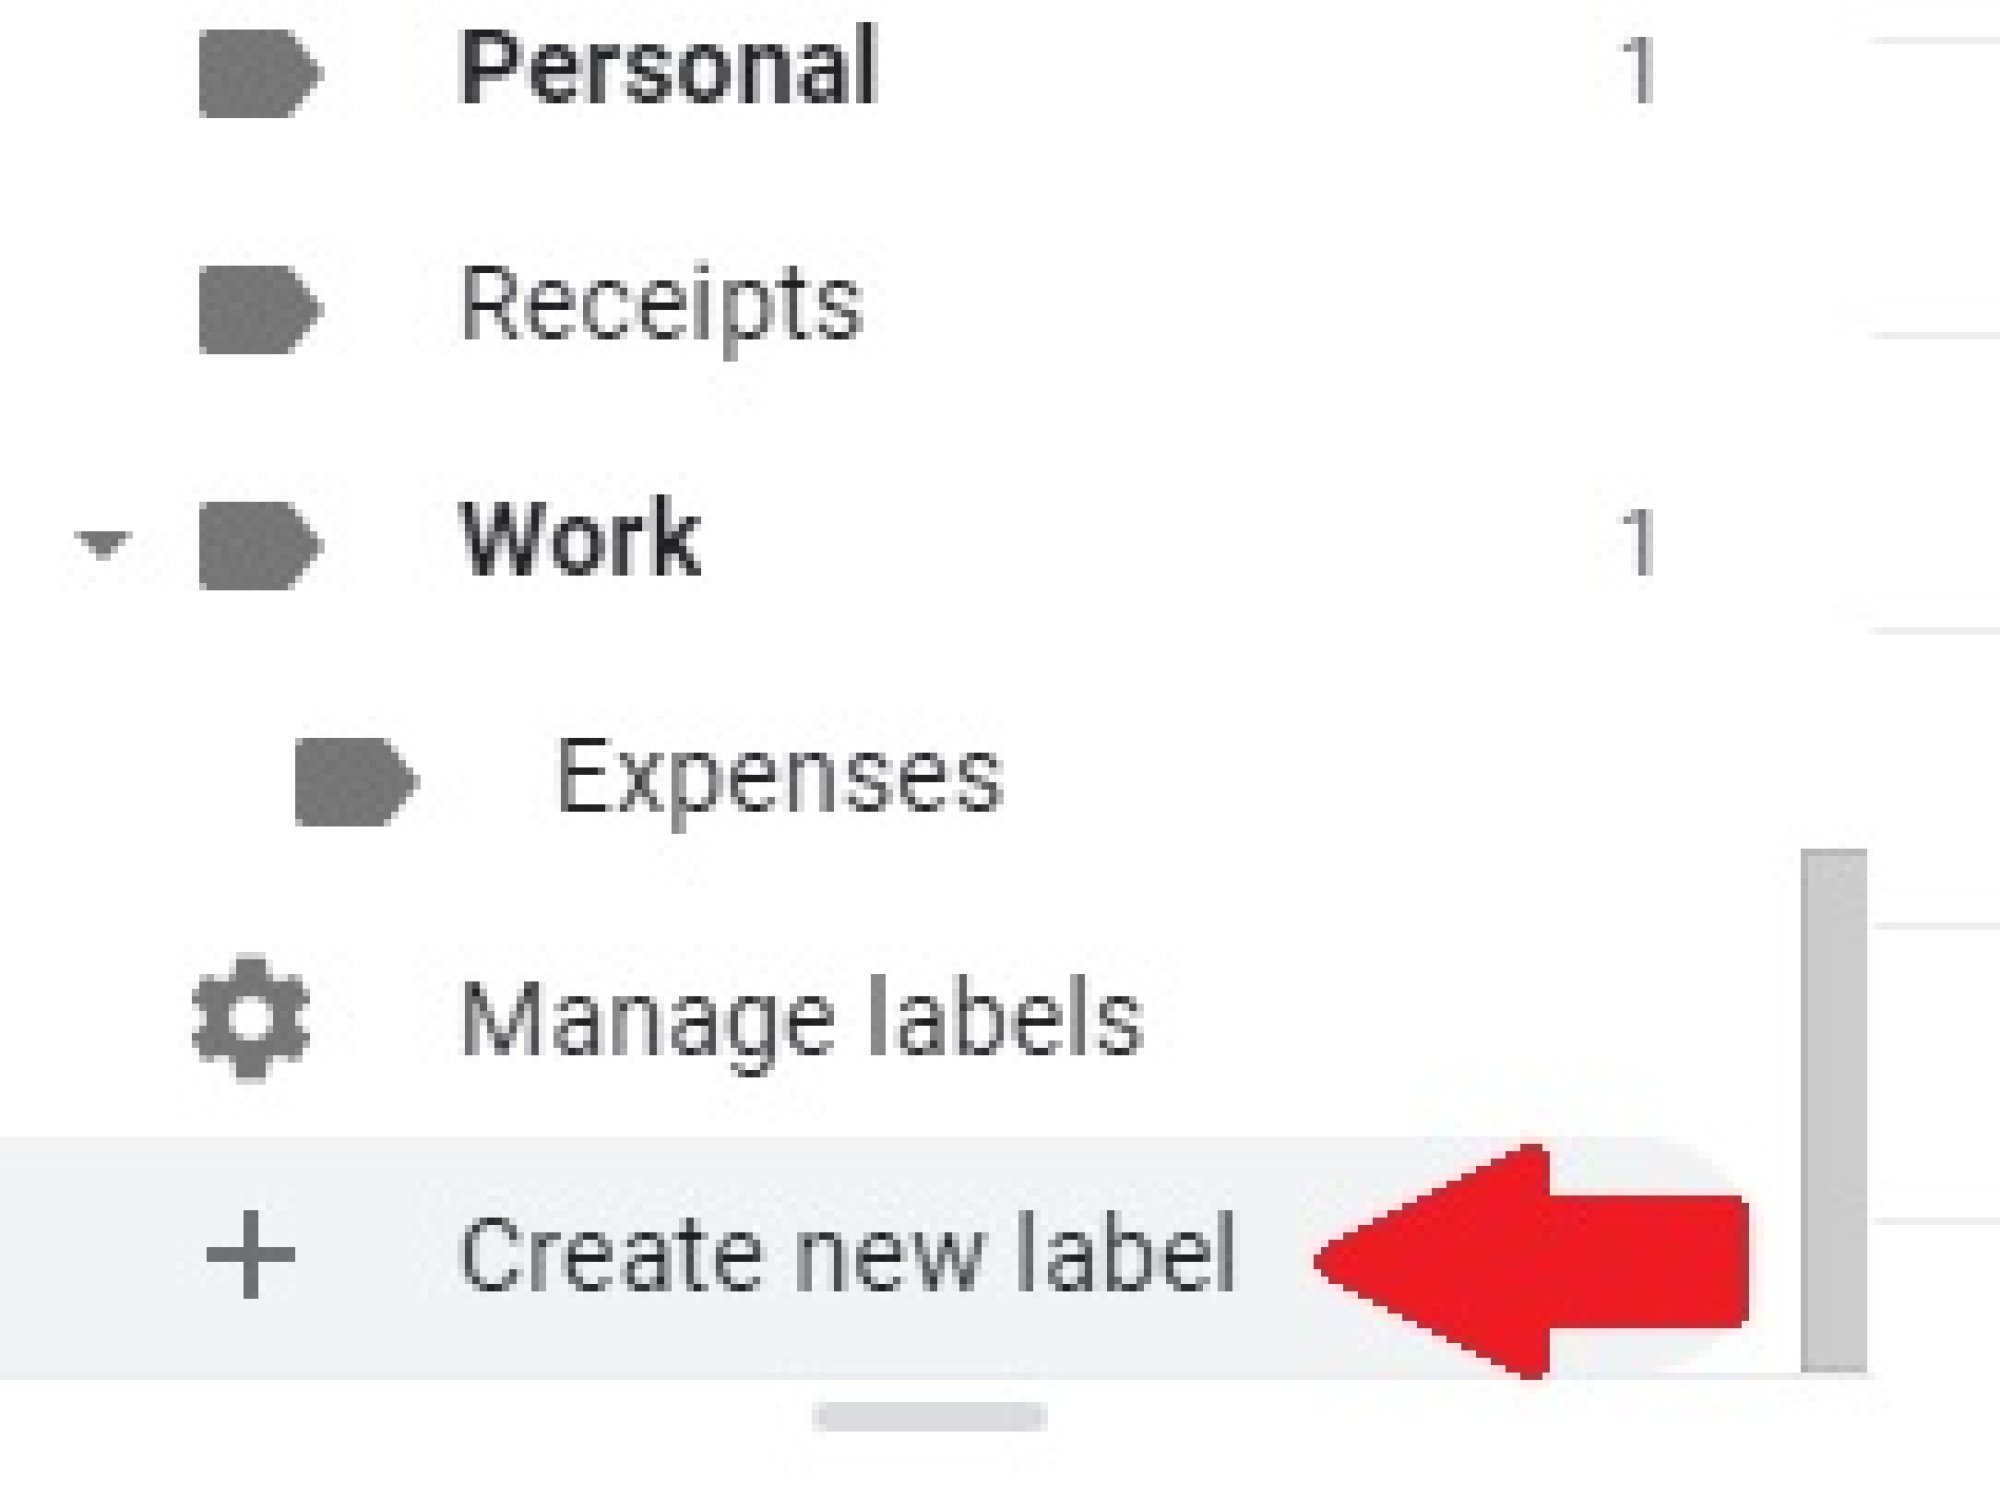
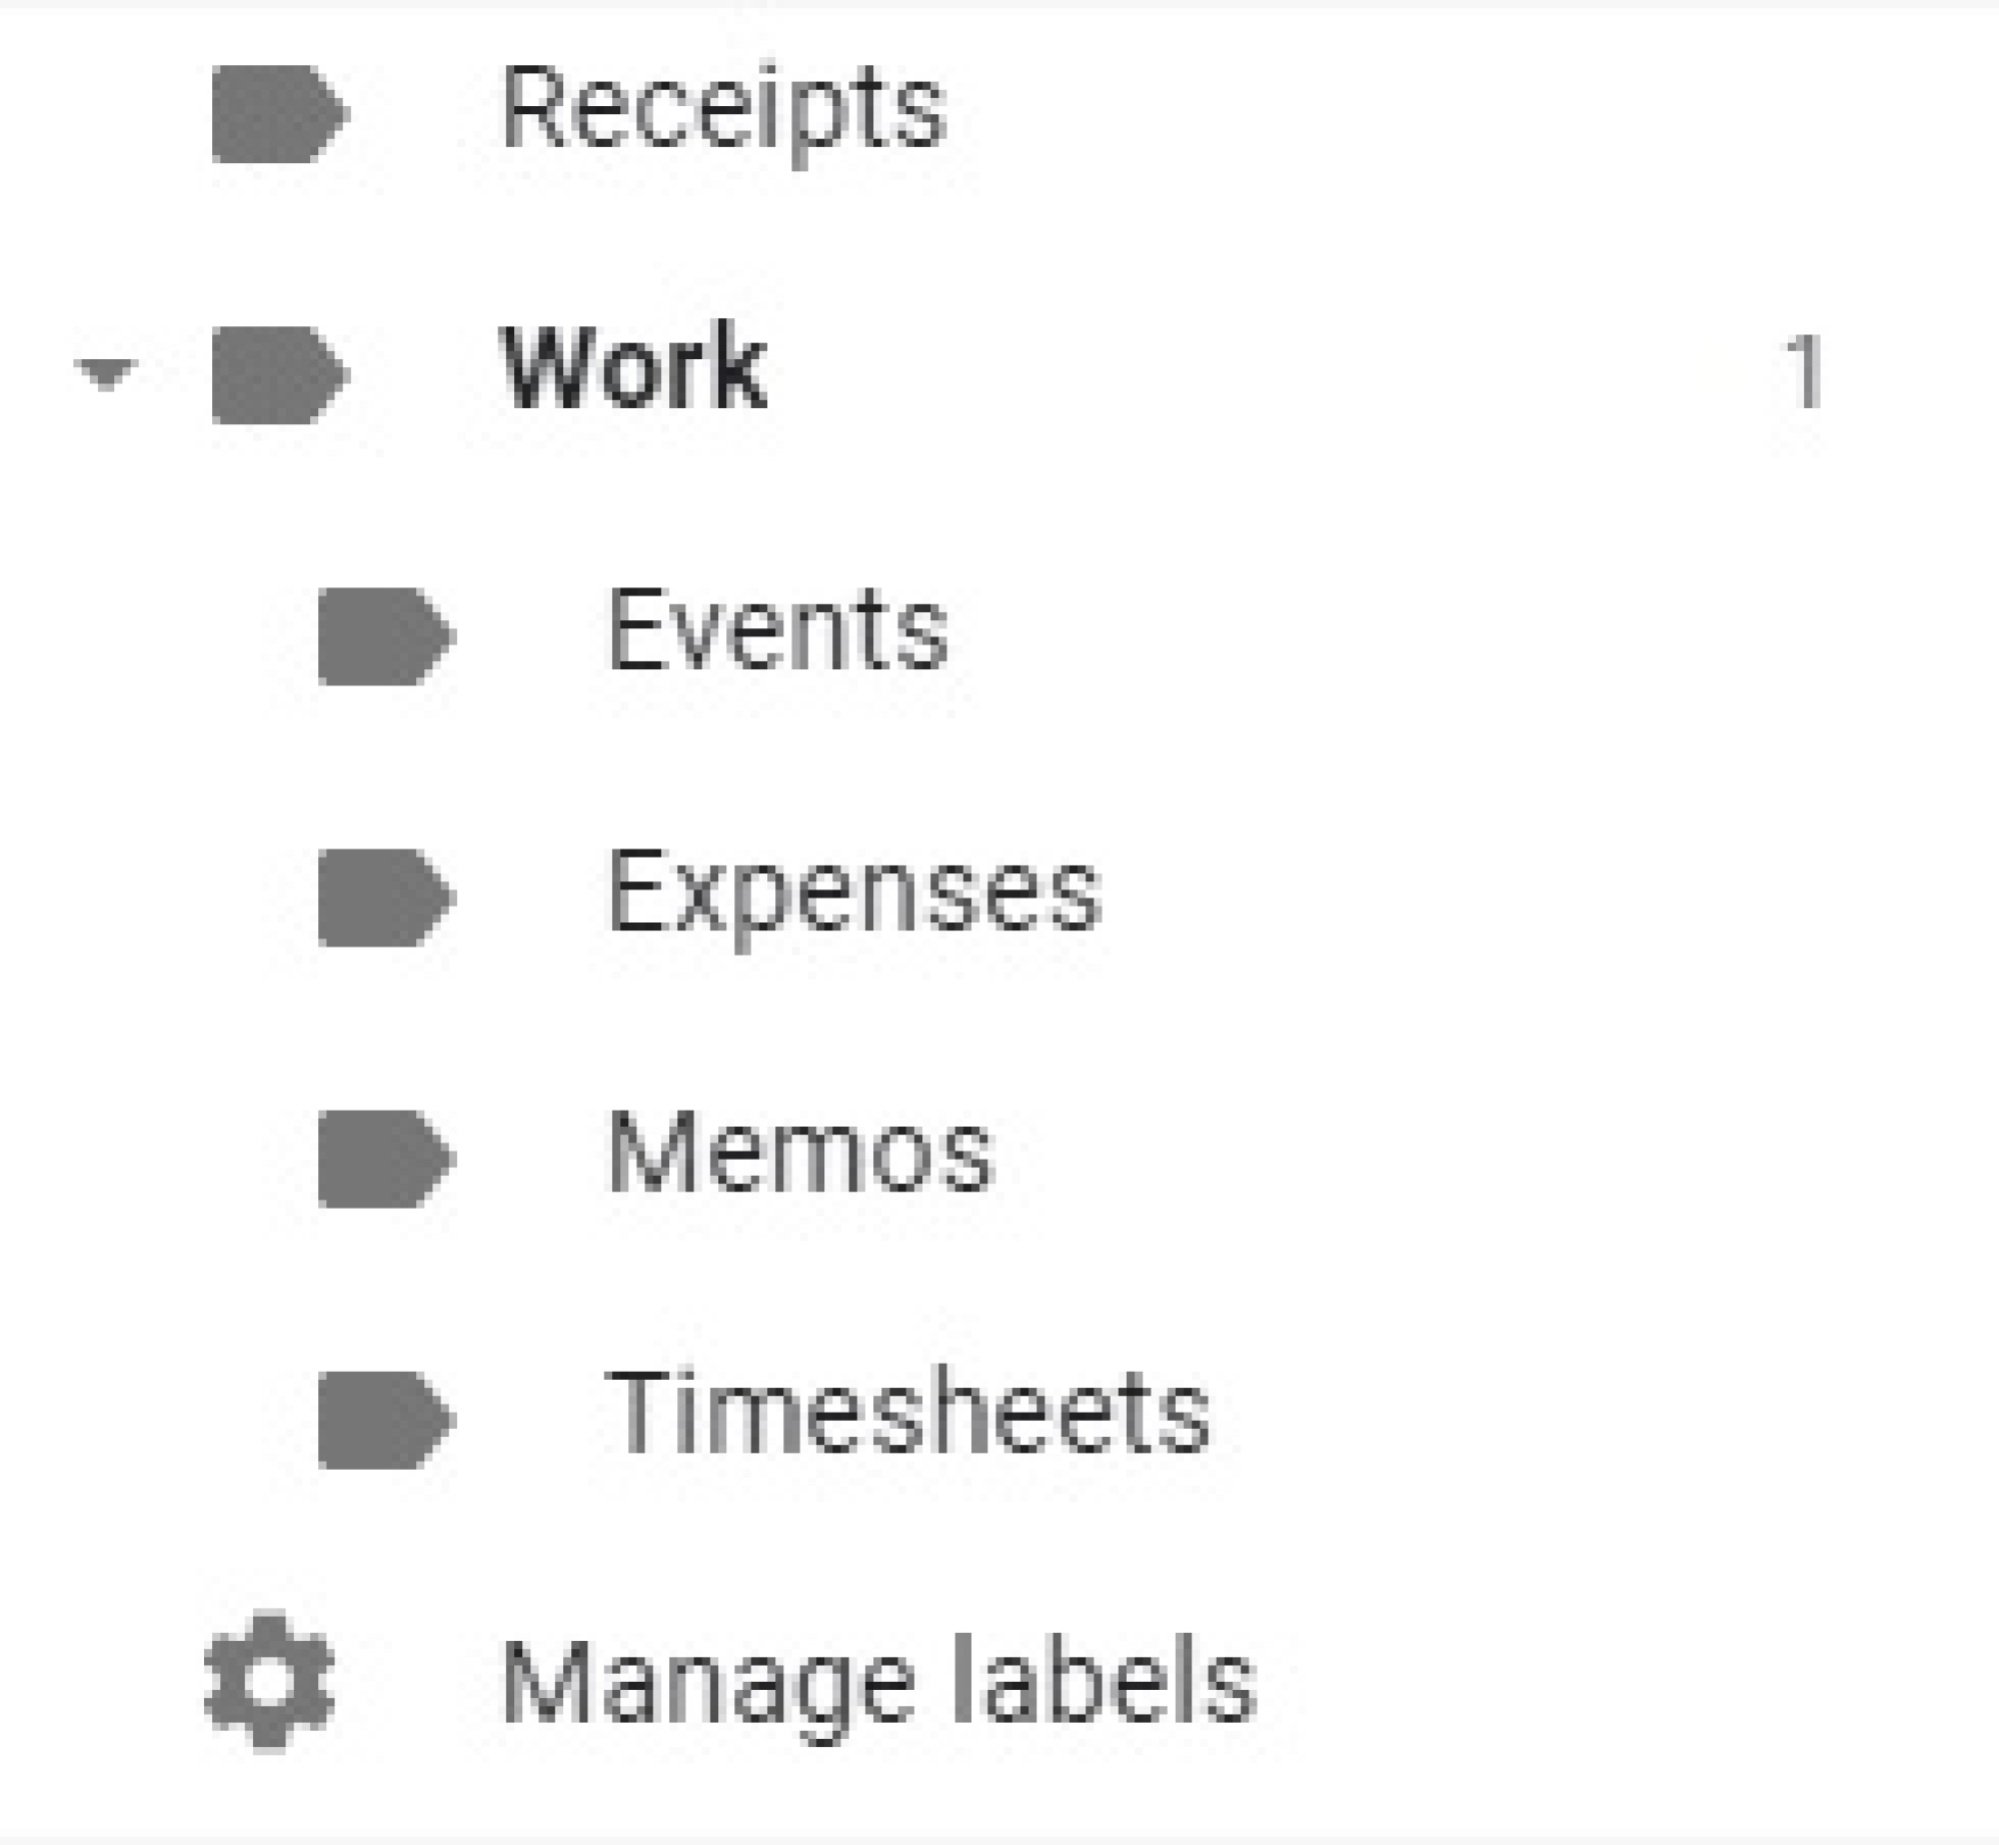
If you click this you can give your label a name. You can also choose to "nest" additional labels under a main label, creating sub-labels.

This is a useful way of really micro-managing your Gmail labels.
You can also change the color of your Gmail labels to give you a better at-a-glance way of organizing your messages. To change the color, hover over the label you want to edit, then click the three dots menu that appears.
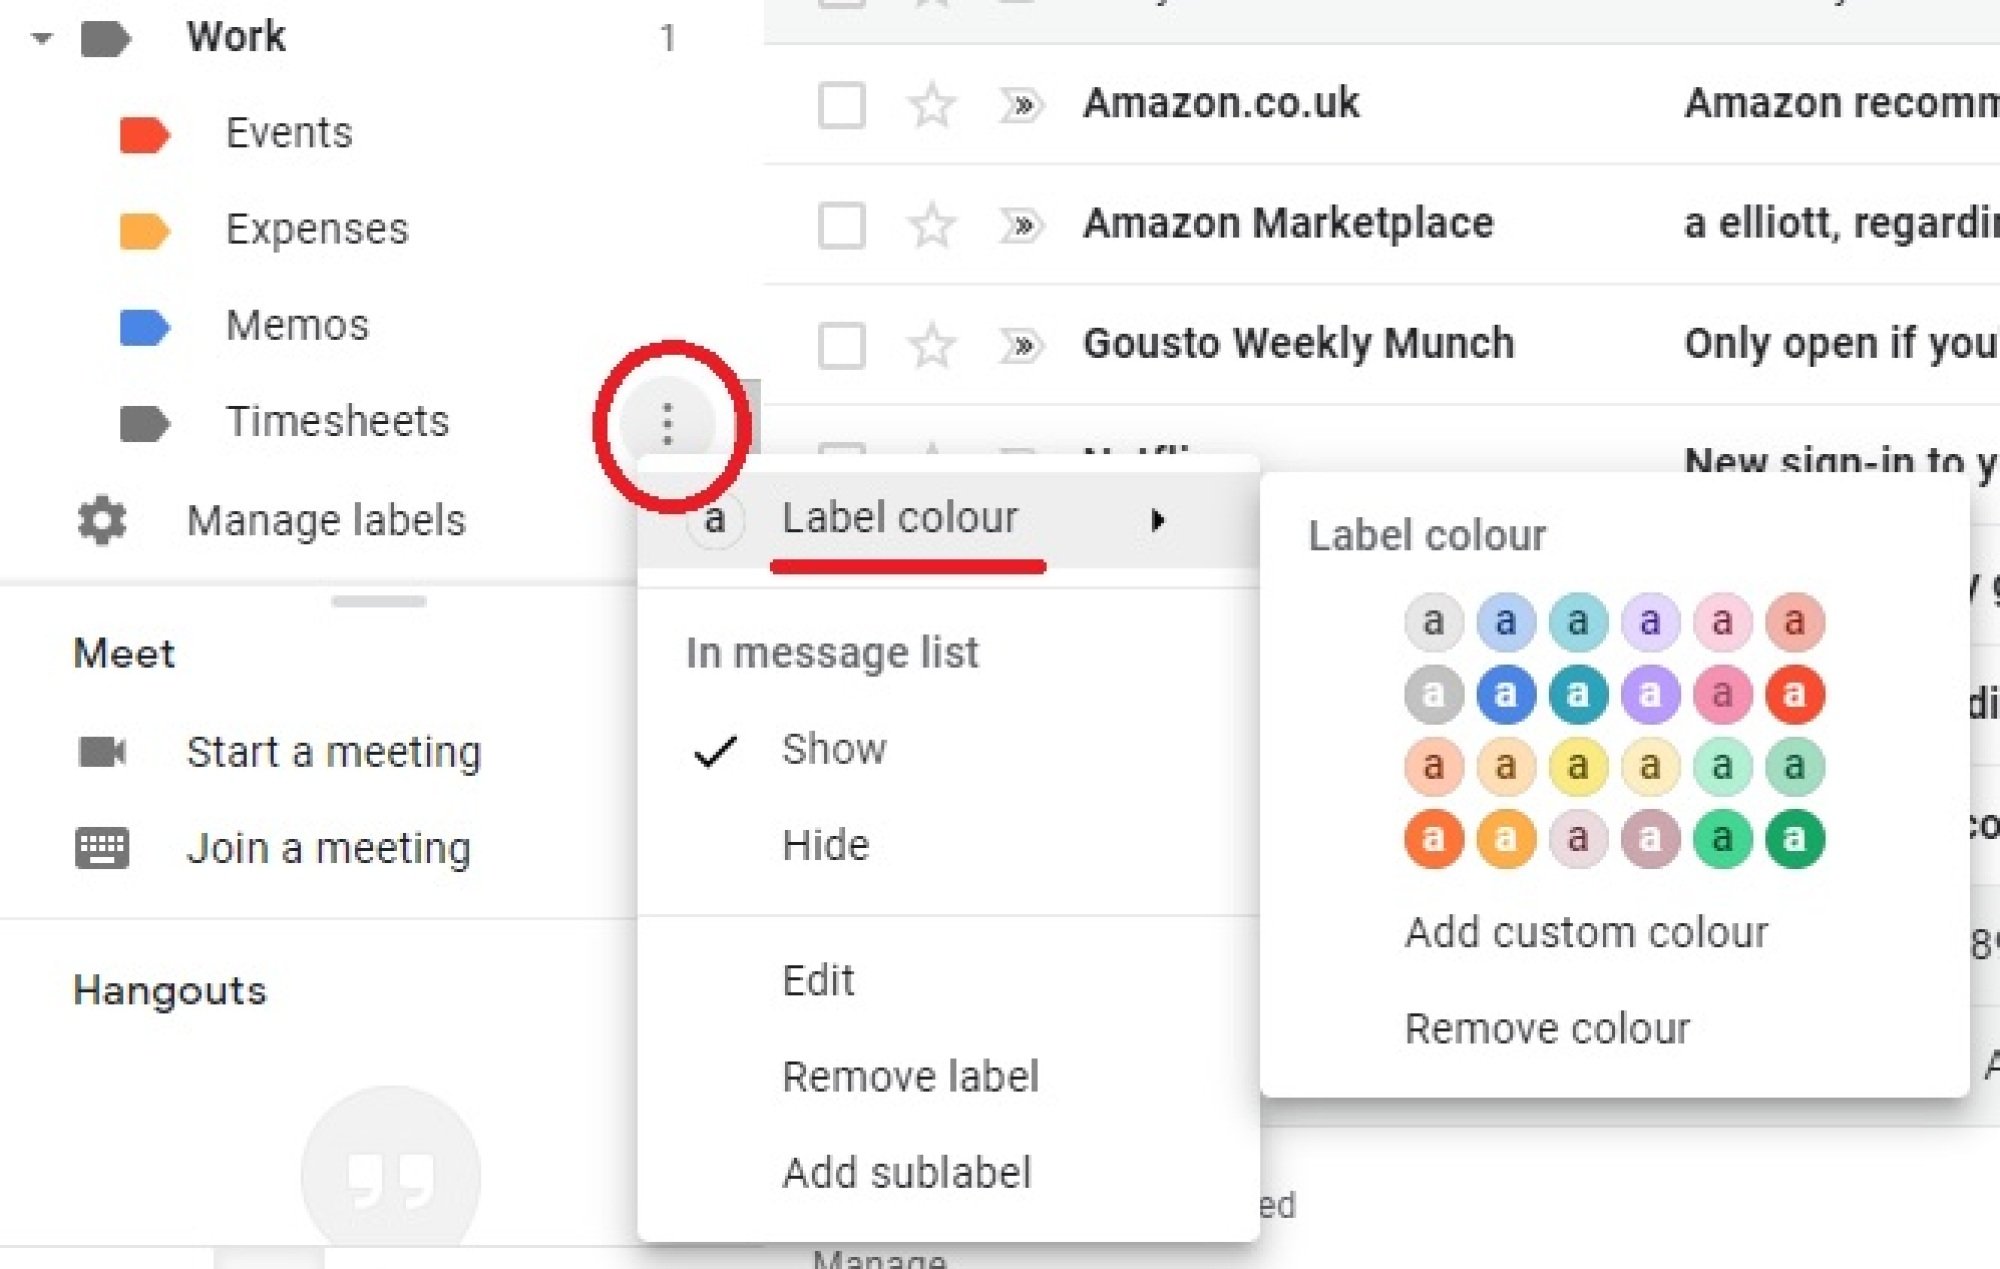
Click "Label color" to change it to one of the pre-loaded options.
The easiest way to move an email to a label is to drag and drop it where you want it. Alternatively, if you're in the email, you can click the label-shaped icon towards the top of the screen to chose the label you want from a pop-up list.

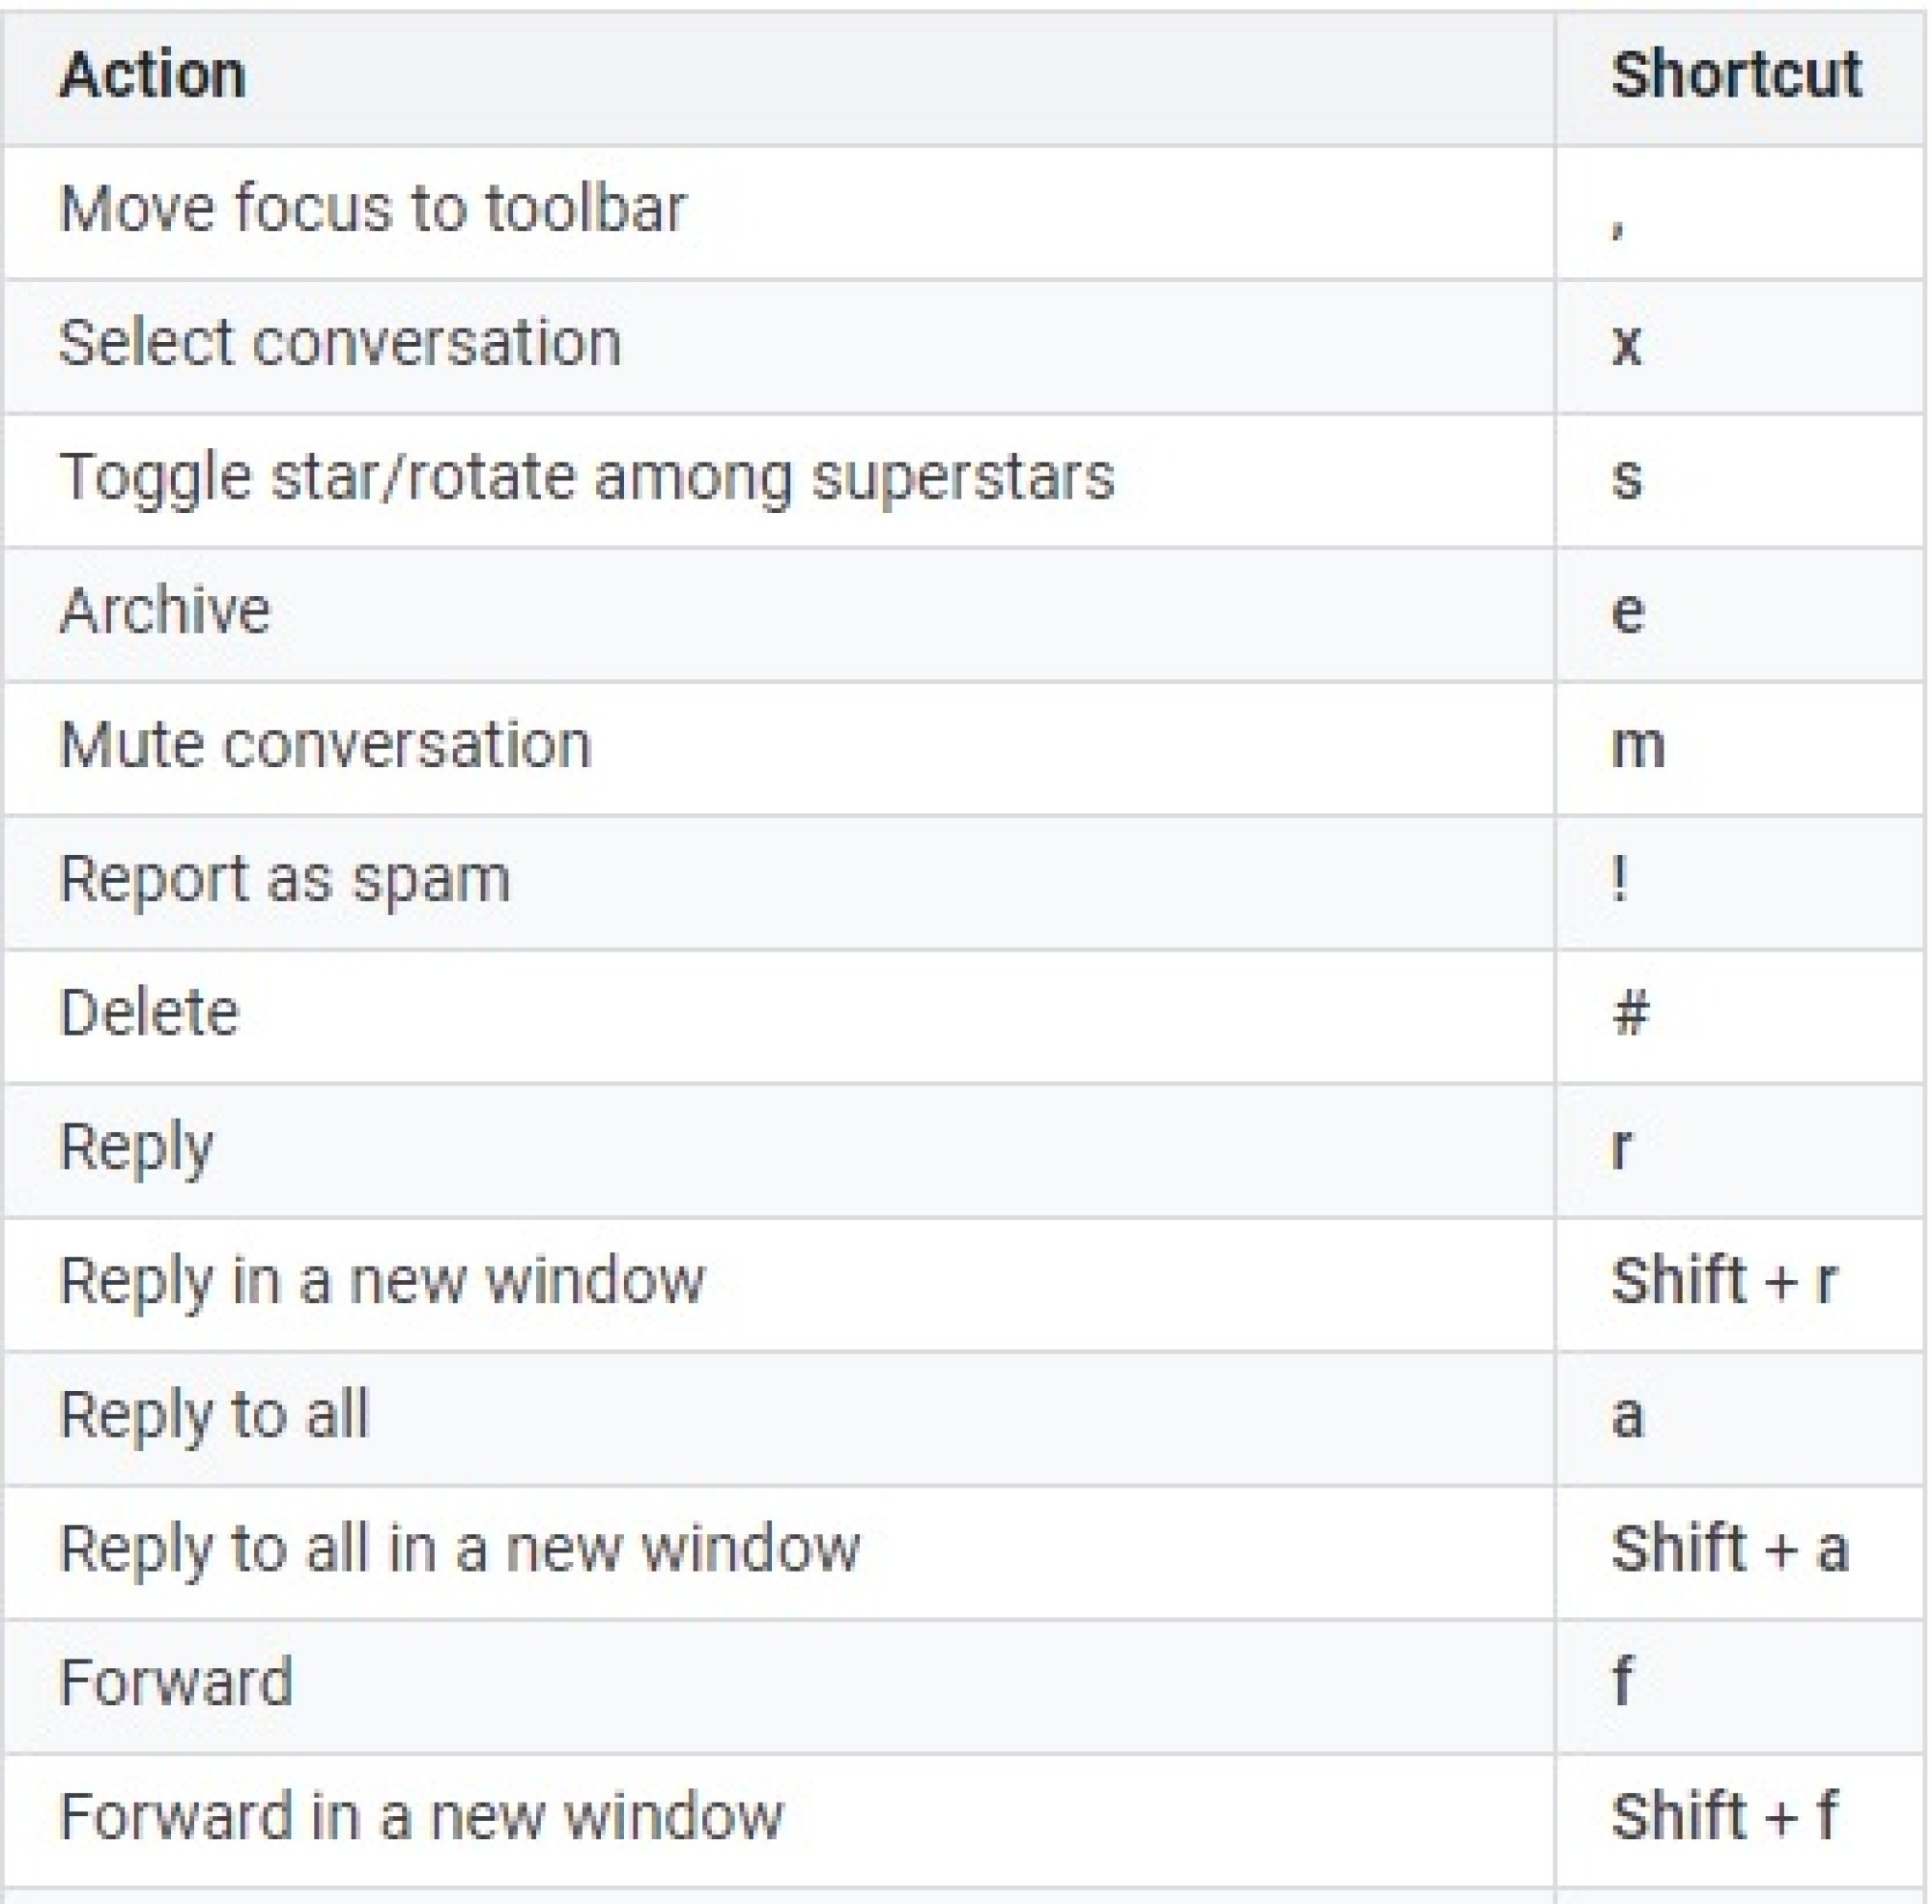
Activate Gmail keyboard shortcuts
If you're someone that uses keyboard shortcuts, then you'll be delighted to hear that Gmail has a comprehensive suite of such actions. In order to start using them, you need to activate them.
Go to your settings, then under "General" scroll down to turn keyboard shortcuts on.

To see a full list of shortcuts that you can now use, take a look at Google's handy guide to all the shortcuts(opens in a new tab) that currently work in the email service.
Use Auto-Advance to speed through your inbox
If you receive a high volume of email that can be dealt with quickly, activating auto-advance is a great way to speedily work through your new emails.
This feature will automatically show you the next conversation instead of taking you back to your main inbox view after you delete, archive, or mute a conversation.
To activate this, head to your settings, then the "Advanced" tab, and toggle it on.

Upping your Gmail game
Not all these tweaks will suit every user, but we hope you've discovered a few useful Gmail tricks that will ease your email burden.
Simply changing how you view your Gmail by adding a reading pane might be the refresh you need to up your productivity. Others may find that taking a little time to create email templates saves them a ton of it in the long run.
Good luck implementing any positive changes you choose to make and do try not to let your inbox stress you out.